在 Eclipse RCP 应用程序中使用 JxBrowser
本教程展示了如何创建一个 Eclipse RCP 应用程序,并将 JxBrowser 库集成到其中。
前提条件
为完成本教程,您需要:
- Git。
- Java 17 或更高版本。
- 有效的 JxBrowser 许可证。可以是评估版或商业版。有关许可证的详细信息,请参阅许可指南。
- 适用于 RCP 和 RAP 开发者的 Eclipse IDE。
- 已创建的 Eclipse 工作区。
获取代码
要查看本教程中创建的完整的 Eclipse RCP 项目,请查看我们的示例集:
$ git clone https://github.com/TeamDev-IP/JxBrowser-Examples
$ cd JxBrowser-Examples/tutorials/eclipse-rcp
添加许可证
要运行本教程,您需要设置许可证密钥。
创建 Eclipse RCP 应用程序
按照说明创建一个简单的 Eclipse RCP 应用程序。
创建 JxBrowser 插件
为了在 Eclipse RCP 应用程序中使用 JxBrowser,在本教程中我们将该库封装成一个 Eclipse 插件,以便其他插件可以使用。
要创建 JxBrowser 插件,请打开 Eclipse 并切换到您的工作区。
在 File 菜单上点击 New,然后点击 Other…。
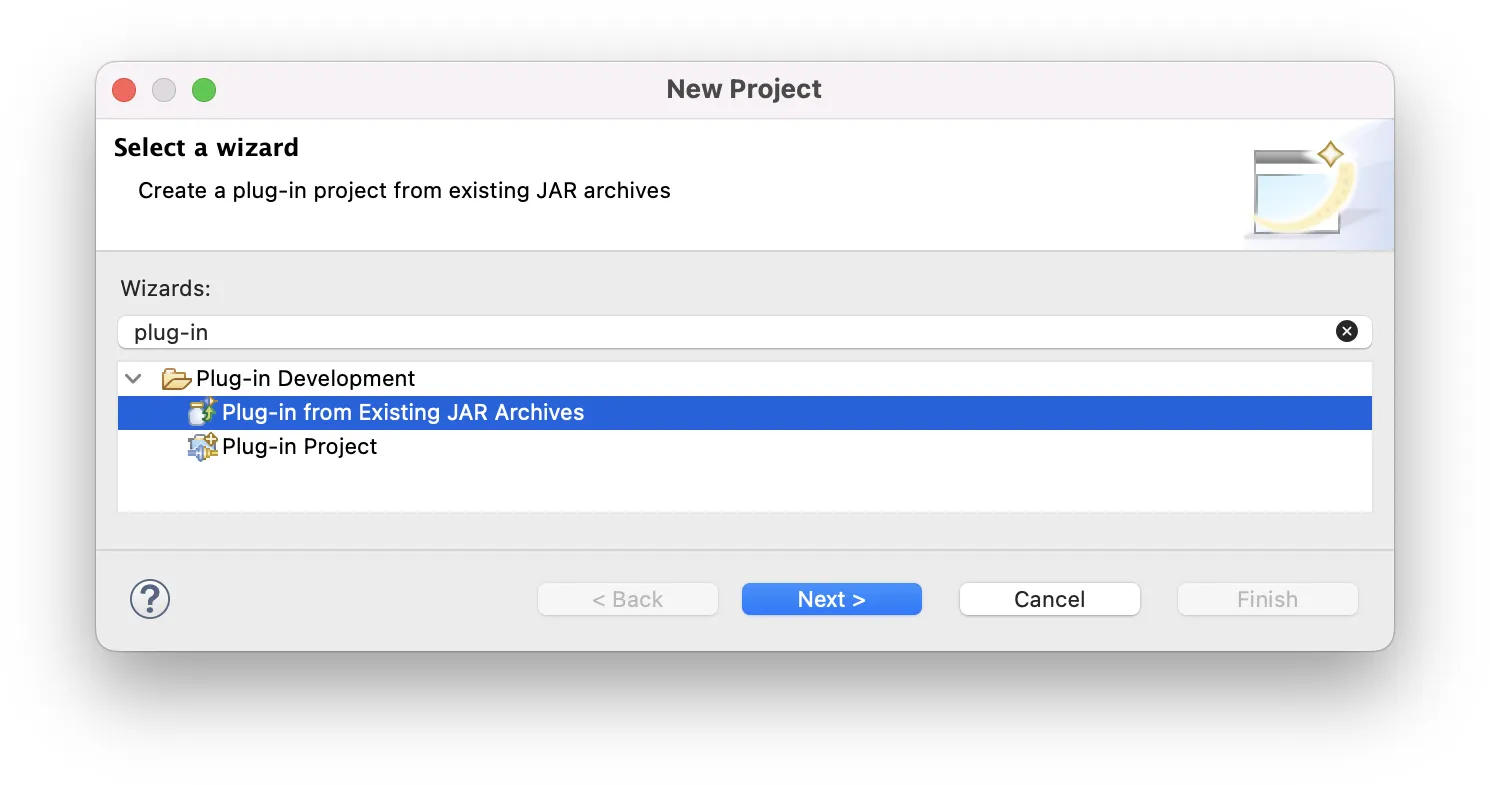
在打开的对话框中,在 Plug-in Development (插件开发) 组中,选择 Plug-in from Existing JAR Archive (从现有的 JAR 归档文件创建插件),然后点击 Next 按钮。
在打开的对话框中,点击 Add External… (添加外部…) 以将 jxbrowser-9.5.3.jar 和 jxbrowser-swt-9.5.3.jar 文件作为外部 JAR 归档文件添加。
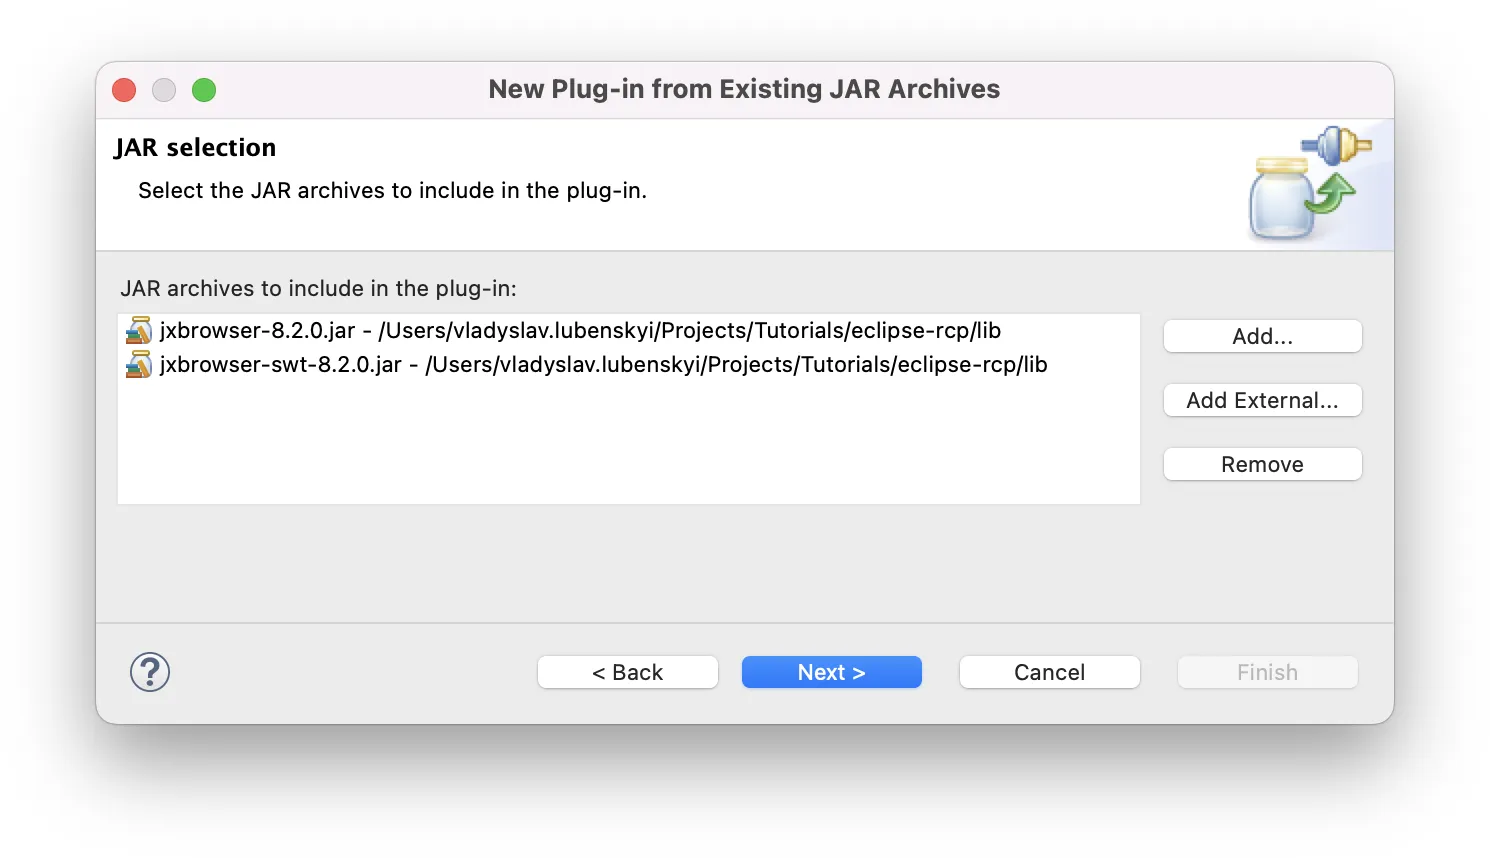
点击 Next 按钮。
在打开的向导中,提供一个有效的项目名称、插件 ID、版本、名称和供应商。请确保 Unzip the JAR archives into the project (将 JAR 归档文件解压到项目中) 这一复选框未被勾选。
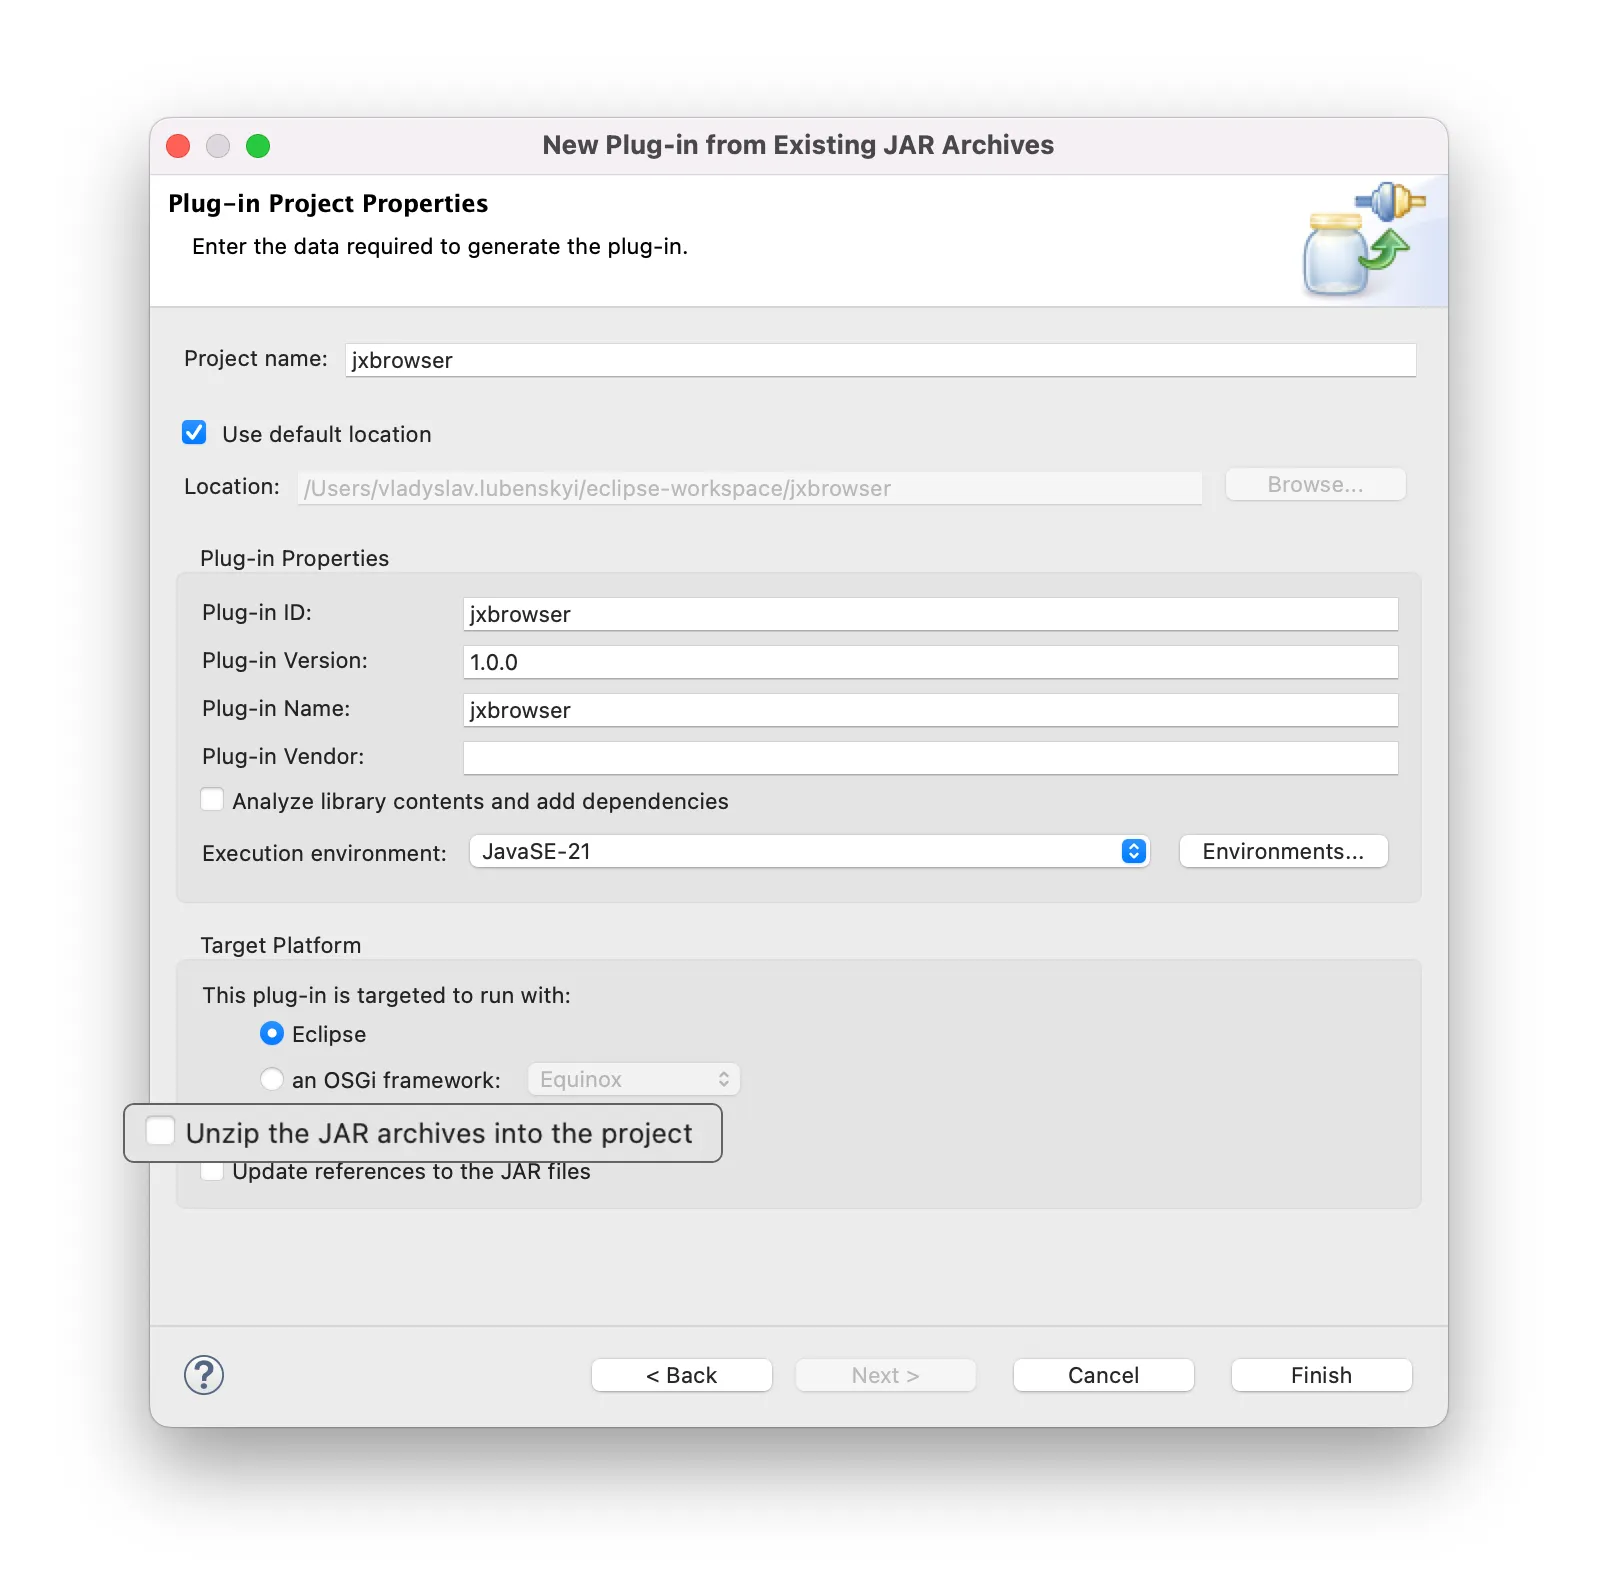
点击 Finish 关闭向导。
打开新创建的 MANIFEST.MF文件,并通过向文件添加以下行来添加对 SWT 工具包的依赖:
Require-Bundle: org.eclipse.swt
创建平台特定的 fragments(片段)
在将 JxBrowser 的核心部分集成到 Eclipse RCP 环境中之后,接下来需要添加平台特定的组件了。为此,我们将使用 Eclipse 的 fragments。Fragments(片段)用于替换或扩展现有插件的功能。Fragments 通常用于包含特定于环境(如操作系统、架构等)的代码。
JxBrowser 提供了多个平台特定的 JAR 文件。我们将为其中一些文件创建 fragments,如下所示。
在 File 菜单上,点击 New,然后点击 Other…。
在打开的对话框中,在 Plug-in Development 组中,选择 Fragment Project 并点击 Next 按钮。
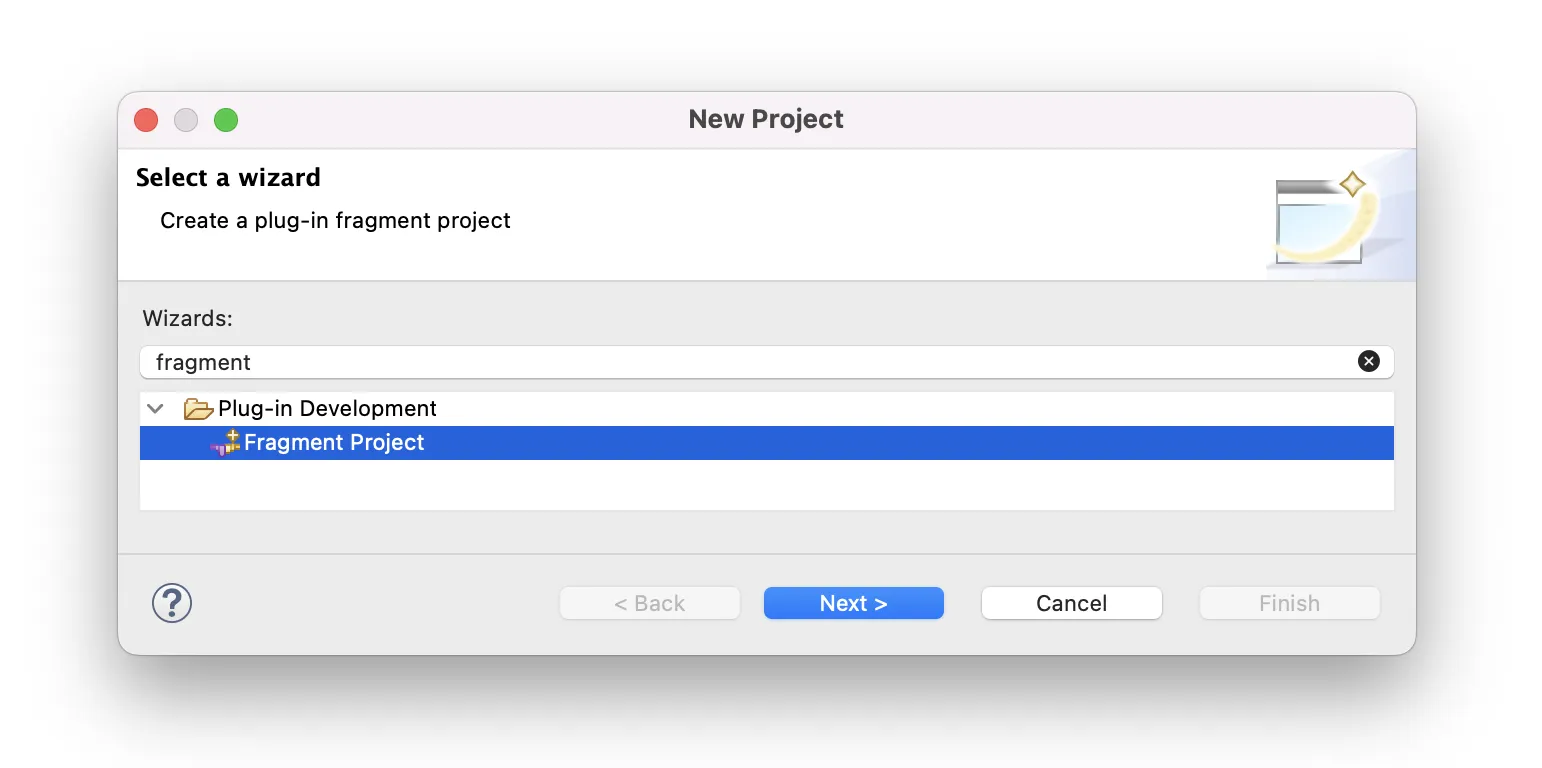
在打开的向导中,提供一个包含平台信息的 fragment 名称。我们建议在 fragment 名称中使用 Eclipse 风格的平台修饰符。例如,jxbrowser.cococa.macosx.aarch64 或 jxbrowser.win32.win32.x86_64。
点击 Next 按钮。
在打开的向导中,在 Host Plug-in (宿主插件) 部分选择之前创建的插件。
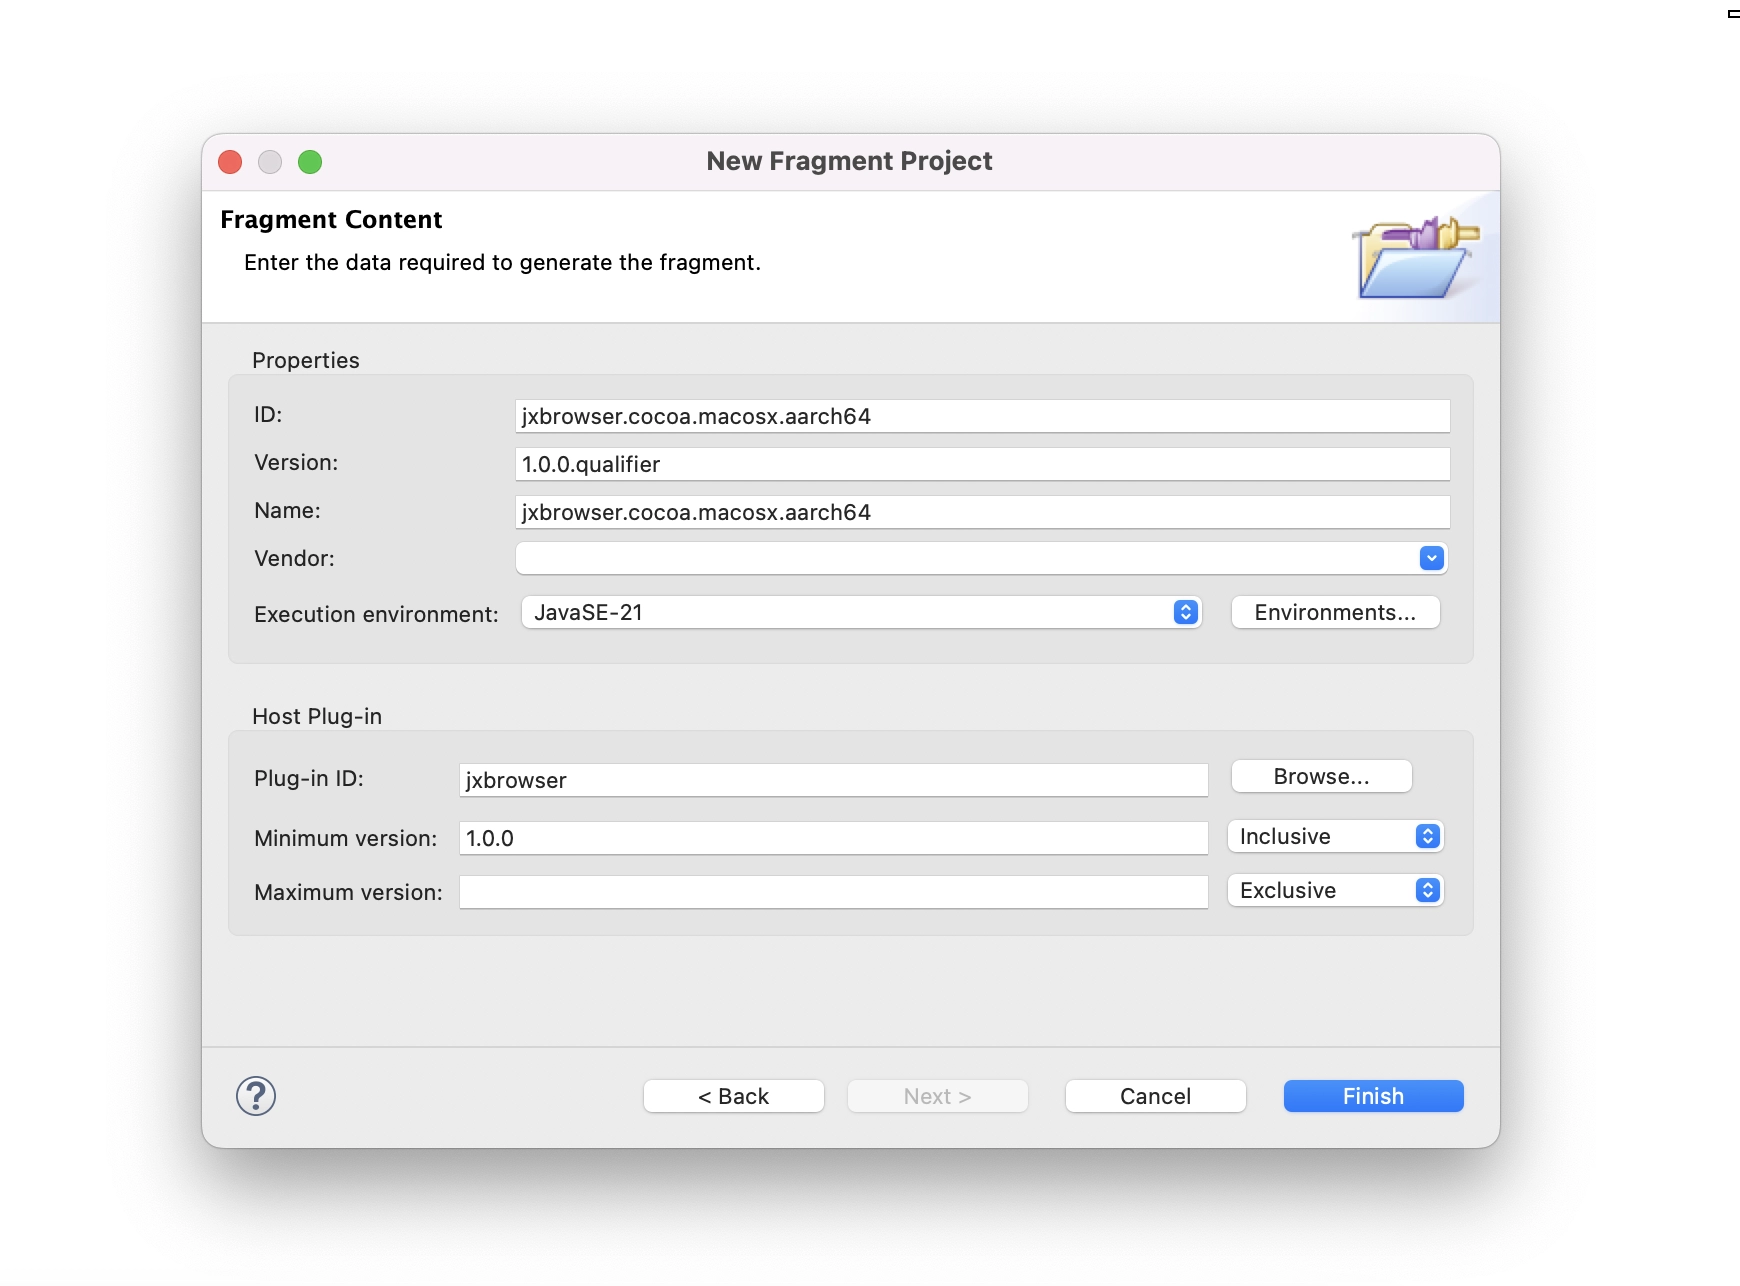
点击 Finish 按钮。
将所需的 JAR 文件(例如 macOS 的 jxbrowser-mac-arm-9.5.3.jar )复制到新创建的 fragment 的根目录。
要将 JAR 文件包含到类路径中,请在 fragment 的 MANIFEST.MF 文件中添加以下指令:
Bundle-ClassPath: jxbrowser-mac-arm-8.2.0.jar
之后,为该 fragment 配置平台过滤器,以便 Eclipse 知道何时使用它。在 MANIFEST.MF 文件中添加以下内容:
Eclipse-PlatformFilter: (& (osgi.os=macosx) (osgi.arch=aarch64))
为 fragments 使用以下平台过滤器:
| 平台 | 平台过滤器 |
|---|---|
| Windows 32 bit | (& (osgi.os=win32) (osgi.arch=x86)) |
| Windows 64 bit | (& (osgi.os=win32) (osgi.arch=x86_64)) |
| Windows ARM | (& (osgi.os=win32) (osgi.arch=aarch64)) |
| Linux | (& (osgi.os=linux) (osgi.arch=x86_64)) |
| Linux ARM | (& (osgi.os=linux) (osgi.arch=aarch64)) |
| macOS | (& (osgi.os=macosx) (osgi.arch=x86_64)) |
| macOS ARM | (& (osgi.os=macosx) (osgi.arch=aarch64)) |
使用来自 Maven 的依赖项
如果您的项目使用 Apache Tycho,您可以通过 Maven 下载 JxBrowser 的构件,而无需手动将 JAR 文件复制到项目中。
为此,请为 jxbrowser 插件和 fragments(片段)创建一个 pom.xml 文件。确保 POM 文件具有以下配置:
<name>jxbrowser.cocoa.macosx.aarch64</name>

<!-- 在 Tycho 中,`eclipse-plugin` 打包方式同时适用于插件和 fragments。 -->
<packaging>eclipse-plugin</packaging>

<properties>
  <jxbrowser.version>9.5.3</jxbrowser.version>
</properties>

<repositories>
  <repository>
    <id>com.teamdev</id>
    <url>https://europe-maven.pkg.dev/jxbrowser/releases</url>
  </repository>
</repositories>

<build>
  <plugins>
    <plugin>
      <groupId>org.eclipse.tycho</groupId>
      <artifactId>target-platform-configuration</artifactId>
      <version>${tycho.version}</version>
      <configuration>
        <environments>
          <!-- 从清单中明确重复平台过滤器。 -->
          <environment>
            <os>macosx</os>
            <ws>cocoa</ws>
            <arch>aarch64</arch>
          </environment>
        </environments>
      </configuration>
    </plugin>
    <plugin>
      <groupId>org.apache.maven.plugins</groupId>
      <artifactId>maven-dependency-plugin</artifactId>
      <executions>
        <execution>
          <id>gather-libs</id>
          <phase>validate</phase>
          <goals>
            <goal>copy</goal>
          </goals>
          <configuration>
            <!-- 这会将 JAR 文件下载至插件根目录。-->
            <outputDirectory>.</outputDirectory>
            <!-- 默认情况下,依赖项将保存为 {artifactId}-{version}.jar
                 将此设置为 `true` 将使文件保存为 {artifactId}.jar。这样,
                 当您更改依赖项版本时,就无需更新 MANIFEST.MF 和 build.properties 文件了。-->
            <stripVersion>true</stripVersion>
            <artifactItems>
              <!-- 列出所有您希望下载的 Maven 依赖项。-->
              <artifactItem>
                <groupId>com.teamdev.jxbrowser</groupId>
                <artifactId>jxbrowser-mac-arm</artifactId>
                <version>${jxbrowser.version}</version>
              </artifactItem>
            </artifactItems>
          </configuration>
        </execution>
      </executions>
    </plugin>
  </plugins>
</build>
在下一次运行 mvn install 时,依赖项将被下载。
添加对 JxBrowser 插件的依赖
在文本编辑器中打开插件的 MANIFEST.MF 文件,并将 jxbrowser 添加到 Require-Bundle 指令中:
Require-Bundle: ...,
 jxbrowser
嵌入 SWT BrowserView
打开 com.example.e4.rcp.parts.SamplePart 类并将其内容替换为以下代码:
package com.example.e4.rcp.parts;

import static org.eclipse.swt.layout.GridData.FILL;

import com.teamdev.jxbrowser.browser.Browser;
import com.teamdev.jxbrowser.engine.Engine;
import com.teamdev.jxbrowser.engine.EngineOptions;
import com.teamdev.jxbrowser.engine.RenderingMode;
import com.teamdev.jxbrowser.view.swt.BrowserView;

import javax.annotation.PostConstruct;

import org.eclipse.swt.SWT;
import org.eclipse.swt.layout.GridData;
import org.eclipse.swt.layout.GridLayout;
import org.eclipse.swt.widgets.Composite;
import org.eclipse.swt.widgets.Text;

public class SamplePart {

    @PostConstruct
    public void createComposite(Composite parent) {
        parent.setLayout(new GridLayout(1, false));

        var engine = Engine.newInstance(
                EngineOptions.newBuilder(RenderingMode.HARDWARE_ACCELERATED)
                        .licenseKey("your_license_key")
                        .build());
        var browser = engine.newBrowser();

        var addressBar = new Text(parent, SWT.SINGLE);
        addressBar.setText("https://google.com");
        addressBar.addListener(SWT.Traverse, event -> {
            if (event.detail == SWT.TRAVERSE_RETURN) {
                browser.navigation().loadUrl(addressBar.getText());
            }
        });
        browser.navigation().loadUrl(addressBar.getText());

        var textGrid = new GridData();
        textGrid.horizontalAlignment = GridData.FILL;
        addressBar.setLayoutData(textGrid);

        var view = BrowserView.newInstance(parent, browser);
        view.setLayoutData(new GridData(FILL, FILL, true, true));
    }
}
将 your_license_key 替换为有效的许可证密钥。保存更改。
运行 Eclipse RCP 应用程序
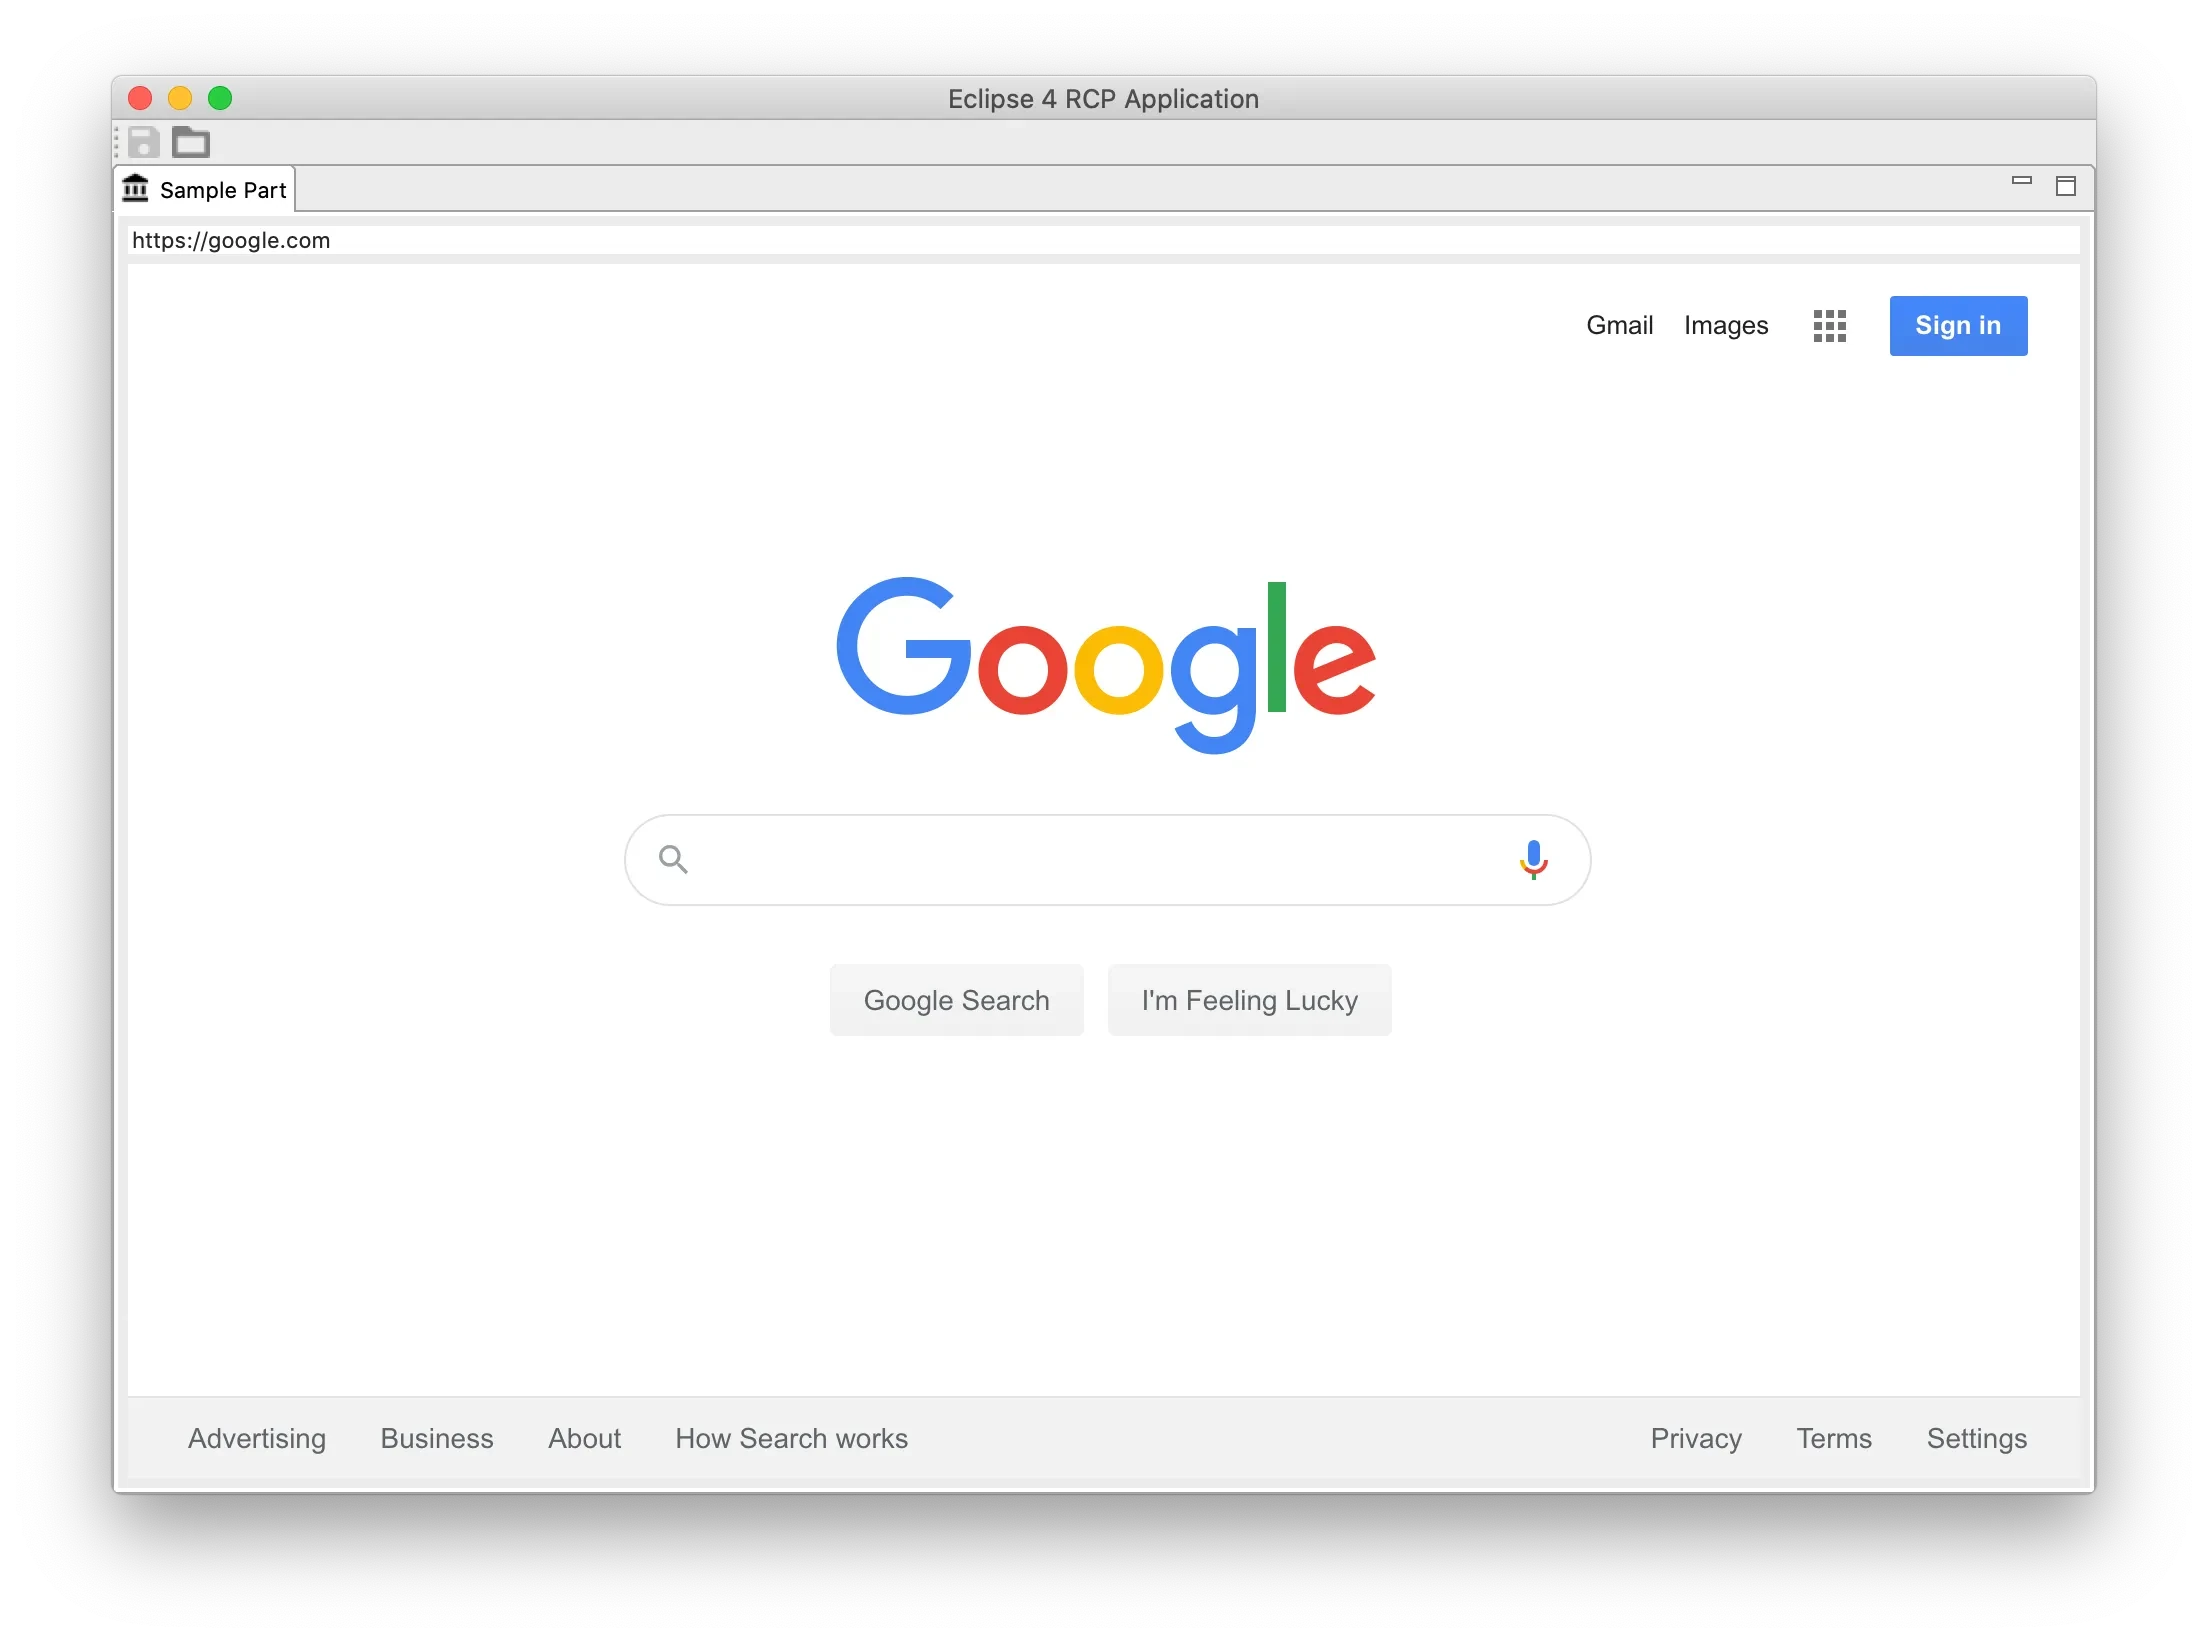
要运行集成了 JxBrowser SWT BrowserView 的 Eclipse RCP 应用程序,请打开 com.example.e4.rcp.product 文件,然后点击 Launch an Eclipse application (启动 Eclipse 应用程序) 链接。
您应该会看到以下结果:
总结
在本教程中,我们完成了以下任务:
- 创建了一个 Eclipse RCP 应用程序。
- 创建并配置了 JxBrowser 插件。
- 为 macOS JxBrowser JAR 文件创建了一个平台特定的片段(fragment)。
- 将 JxBrowser 插件添加到了 Eclipse RCP 应用程序中。
- 将 SWT
BrowserView控件嵌入到了 Eclipse RCP 应用程序中以显示网页内容。